

I stumbled across this Academy kit at my local hobby shop a few weekends ago. I’ve always liked the looks of the Mk1 through III Merkavas (the MkIV looks too much like a “Box on tracks” in my opinion), and with the IID containing a mix of MkII and MkIII feautures, heavy combat use, and an MSRP of only $45, it became an instant “must-have”!
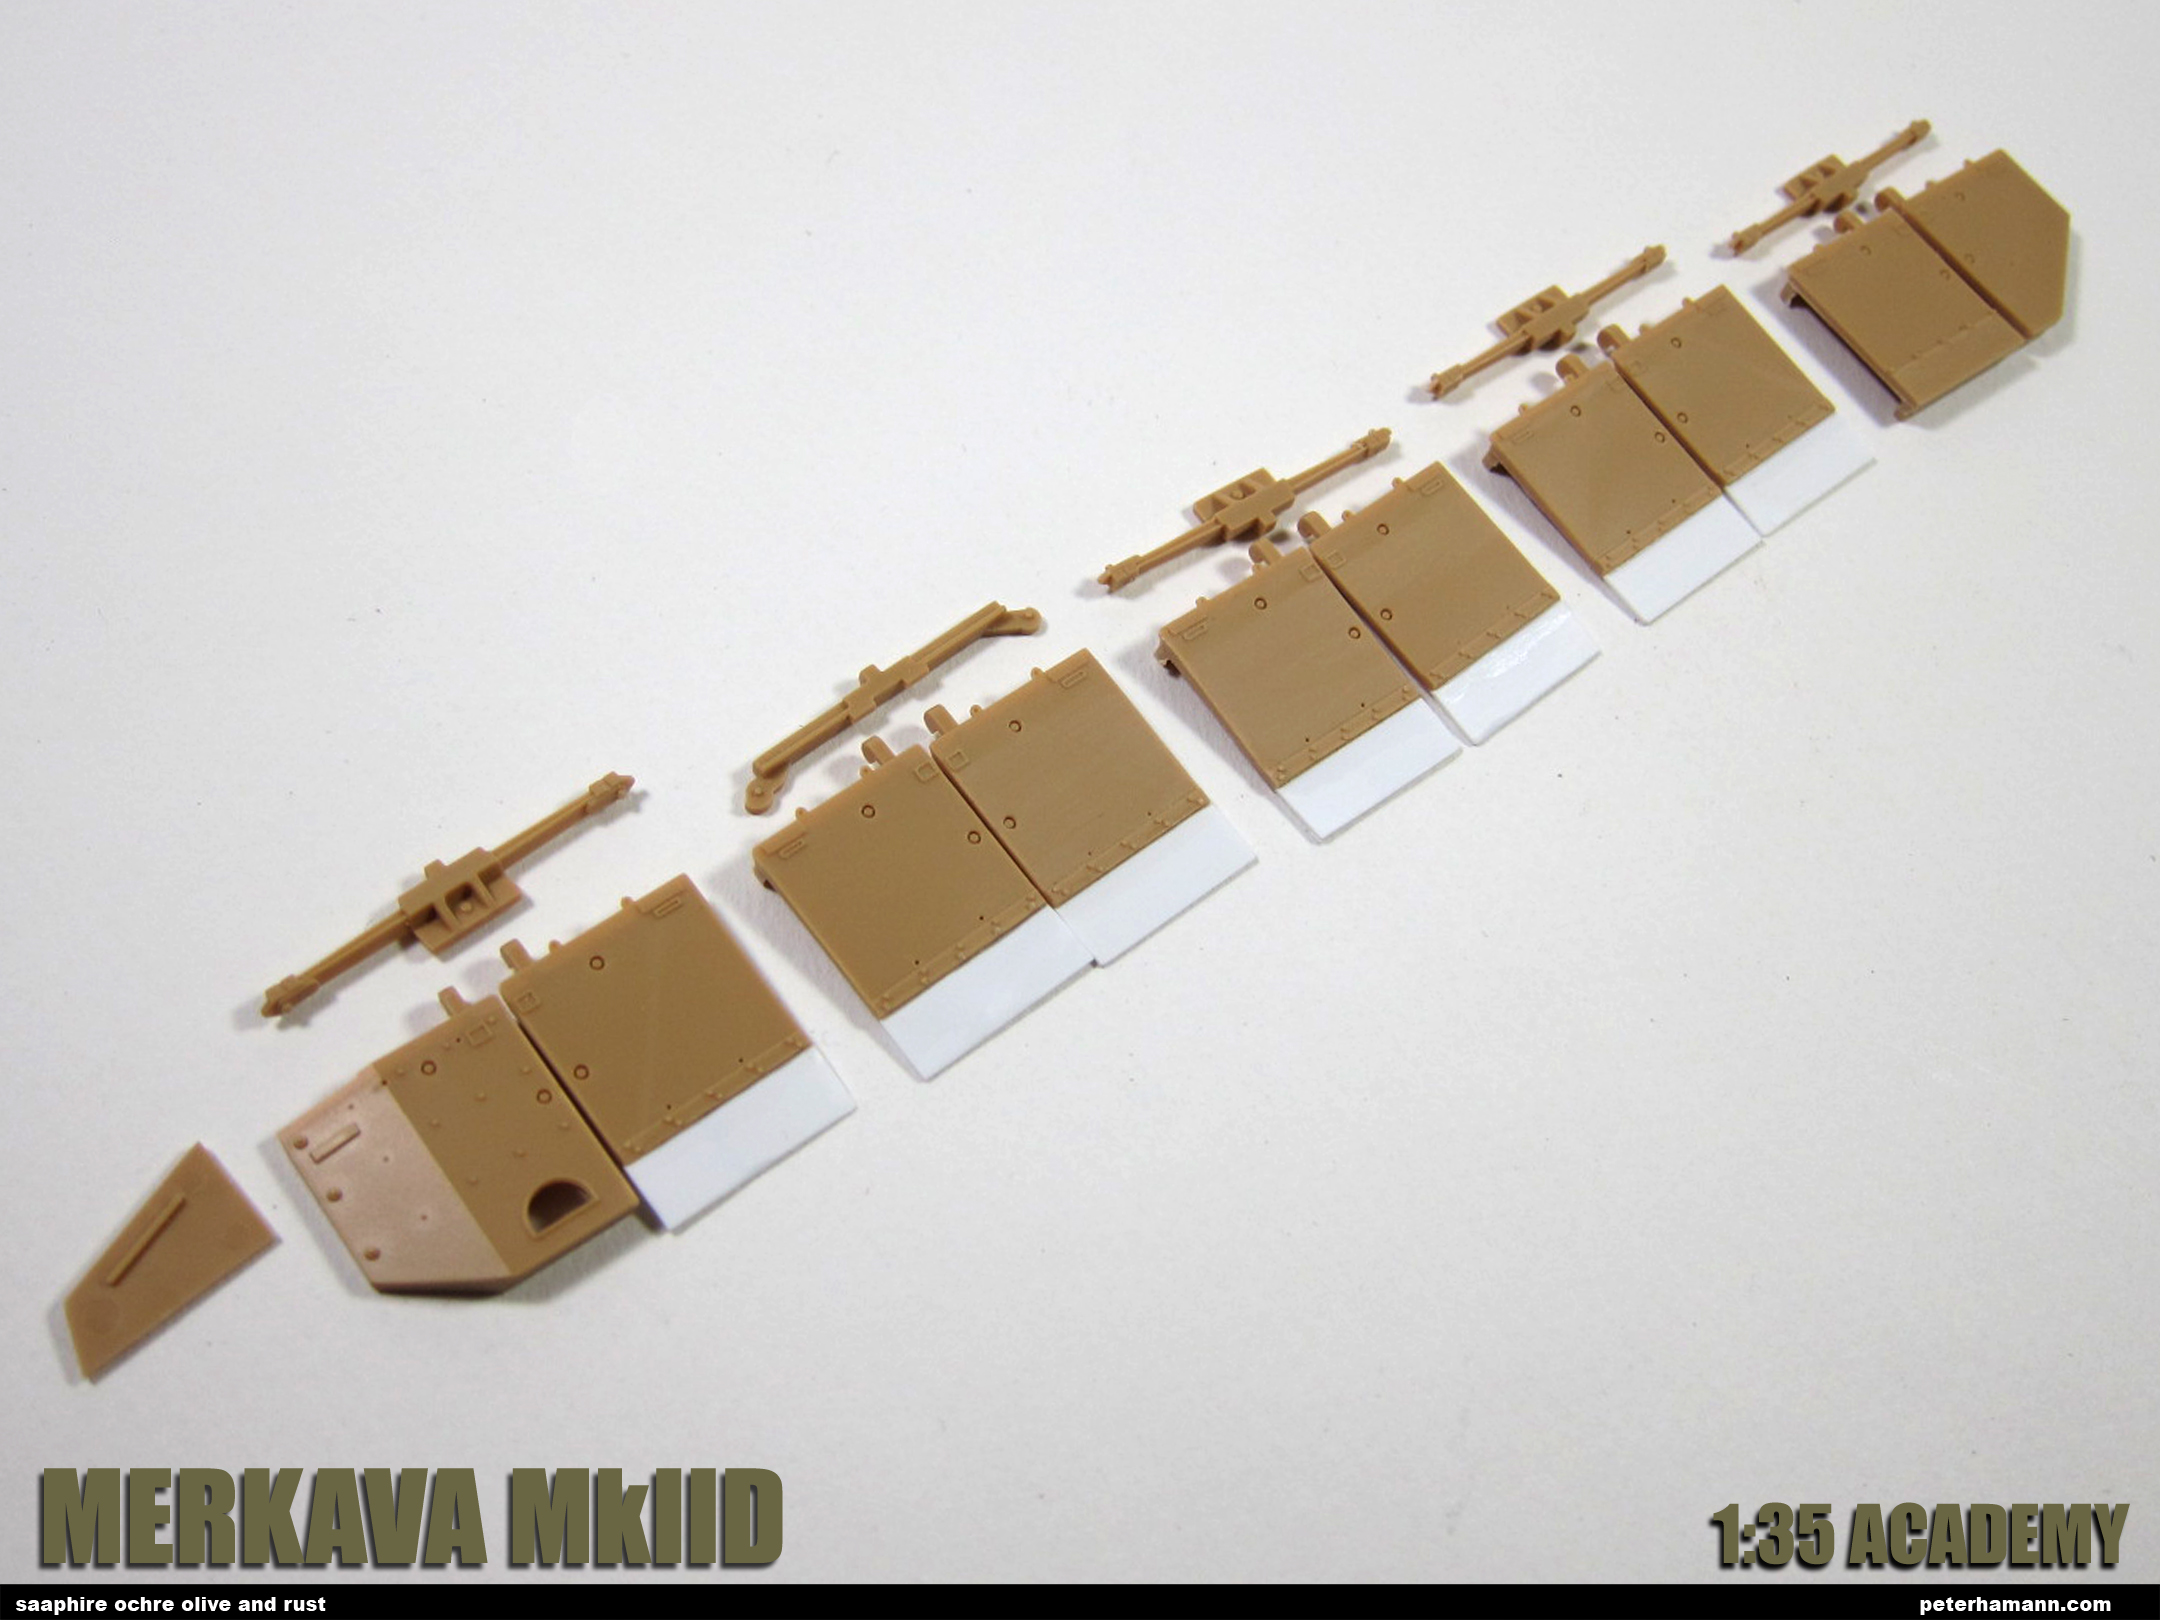
I blew through most of the basic construction and parts cleanup in a couple of sessions. One of my deviations from the strict “out of the box” plan included chopping the skirts up for a more organic appearance. Merkava skirts are split into paired sections of 2 skirt segments, with each section mounted to the hull on a spring steel frame. These sections are free to move, mostly independently from adjacent sections, resulting in non-planar orientations of all sections. To me this is one of many small “tells” that help to add liveliness and realism to a scale model, and it’s fairly easy to incorporate.
I started by labeling each of the backsides of the various segments (L-1, L-2, L-3, R-1, R-2, R-3, etc…) to help me relocate them during final assembly. Then I cut small slits at the skirt segment breaks in the backside structure, so it would be easier to snap the segments apart after scoring the visible side with a sharp blade. After the segments were separated, I cut away the rubber portions and replaced them with slightly beat-up styrene versions.
General assembly commenced and was progressing nicely when I came to the turret and a big fat empty hole where a bunch of tanker stuff should go: The Bustle. Pictures of the area were hard to come by, and what photos I did find showed that the area was often covered by a cloth cover. I also found images of Legend Production’s Merkava MkIID detail set, which includes, among other things, a very nicely rendered cloth turret basket cover. I really didn’t want to spring for the full set, and I have always felt that soft goods is an area I struggle with, so what better opportunity to develop my sculpting skills? If I succeeded I would be rewarded with many Facebook “Likes”. If not, I could shelve the beast and move on to something else in the stash. I used photos of the Legends parts as reference and busted out my collection of epoxy putties.
I started by replicating the vertical element of the cover, inside the back face of the basket, with Tamiya epoxy putty. After that cured, I filled the bulk of the basket with a chunk of foam, then packed the rest with some really old Miliput Terra Cotta that was getting quite hard and unusable for finer work. I added some rolled up blankets made from Miliput and Tamiya epoxy putties to one of the corners, and a .50 Cal ammo can to the other corner. After all of that had cured, I rolled some of the Terra Cotta putty flat and added some “structure” underlays that would peek through the final top layer.
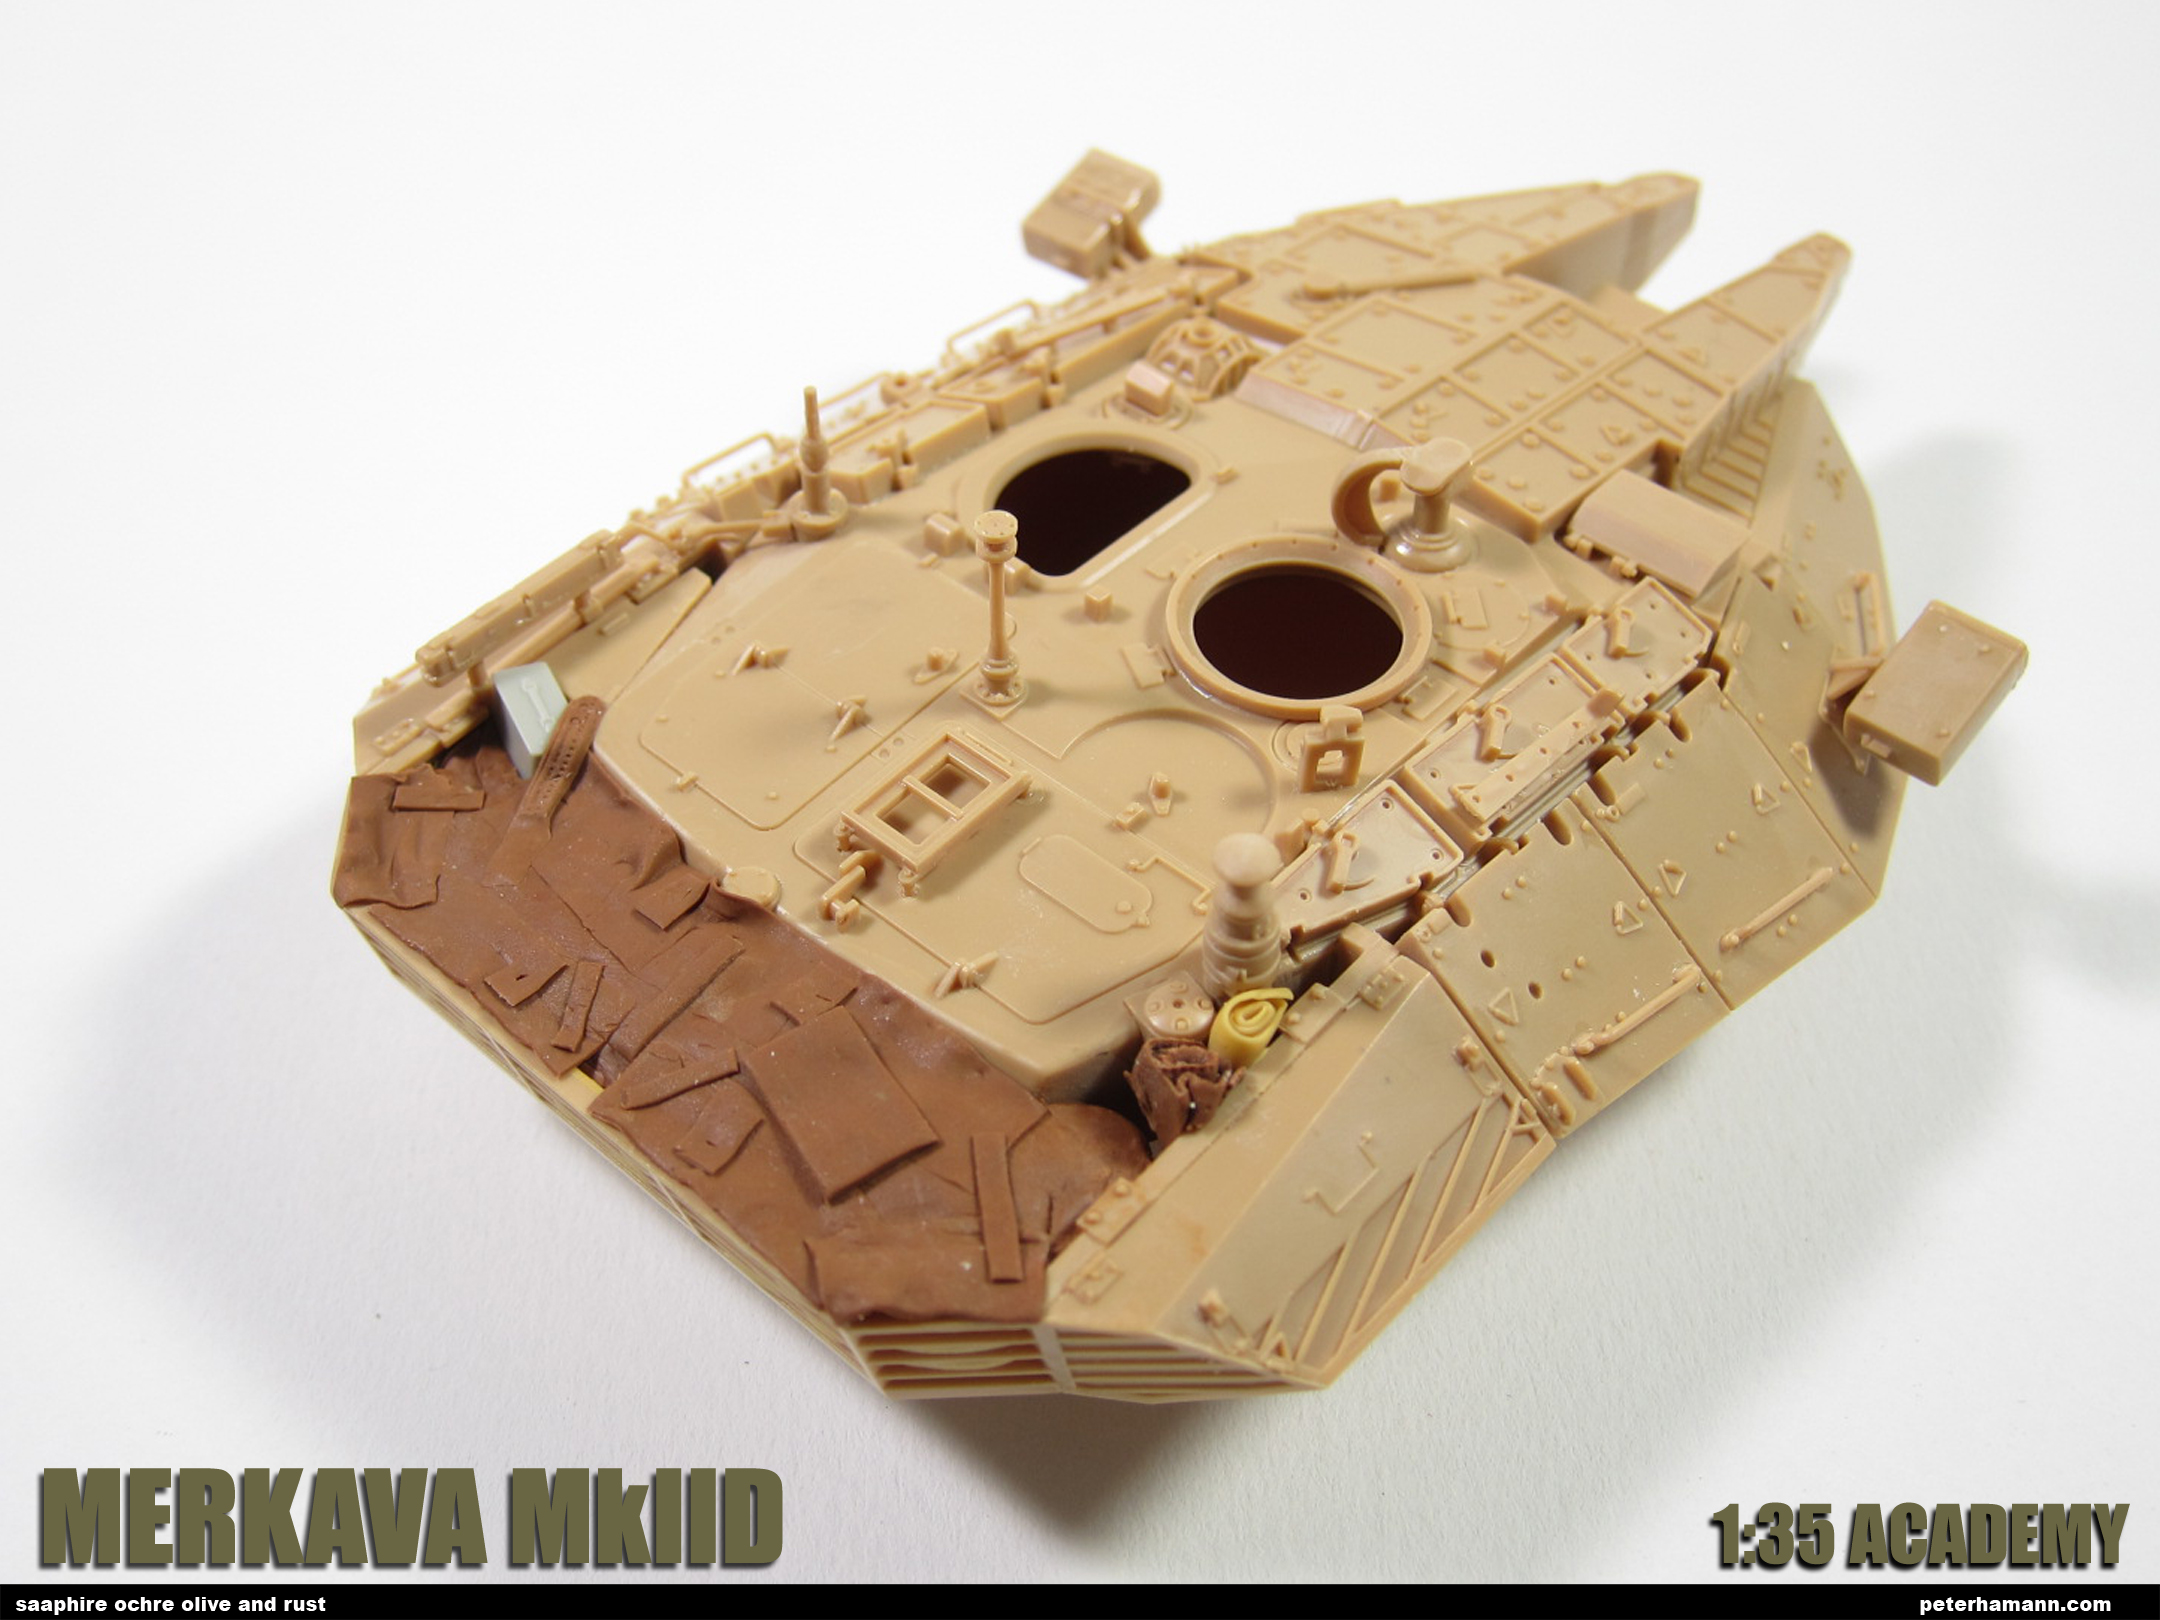

The top layer was made with Tamiya epoxy putty rolled very thin on a cutting board dusted with talcum powder. The Tamiya epoxy putty accepts detail well and cuts nicely if you press straight down on it. I added details and straps with the tip of an old Micron pen, from which I have removed the felt nib.


Next I will follow roughly the same process to model the rear hull stowage boxes.

Thanks for looking. Now go build something!
Pete
