More 1:48 scale T-62 fun!

IMG_4890

While waiting for my printed hatch to arrive…


hatch renders-2

I decided to go ahead and prep the turret for the new part, and to add the rest of the miscellaneous details to the turret and hull.

IMG_4783

I started by cutting off the molded commander’s hatch. Tape was used to protect the surrounding details while a razor saw was used to remove the hatch.

IMG_4787

Then I used a motor tool to grind away a pocket that would allow me to mount a figure later. In the mean time, I plan on painting the pocket black to provide some depth and to create the illusion of a hollow turret.

IMG_4840

When grinding resin, I like to hold the part over the open end of the hose with the vacuum running. I just tape the hose of my vacuum cleaner to the edge of the desk, or hold it between my knees. I really should put a screen over the nozzle!

IMG_4857

I decided that I wanted the ring around the commander’s hatch to have more depth, so I fashioned a new version out of styrene using circle templates and an un-sharpened hypodermic needle. I cut the inner ring (representing the opening) first, but not all the way through. Then I placed the circle template back onto the styrene, but using the diameter slightly under the diameter of the final outer profile of the ring. This was done to guide the needle as I pressed the bolt pattern (to ensure a concentric bolt pattern). After I finished adding the bolt detail, I moved the circle template a final time so that the final outer profile diameter was in place, and finished cutting the piece from the sheet. Then all that was left was to carefully cut the center loose and attach the ring to the turret. Just to see what it looked like, I tack-glued the scrapped hatch in place.

IMG_4862

IMG_4865

IMG_4867

IMG_4873

I fashioned the turret grab handles from the kit supplied brass rod, and made new lifting hooks from styrene. I thought I had lost the kit parts, but it turned out that they were in the bag, I just didn’t recognize them!

IMG_4879

Headlight guards were bent from brass rod, inserted into pre-drilled holes, and the cross pieces soldered in place.

IMG_4883

IMG_4880

The rest of the small details were added. I used brass pins wherever possible. This serves two purposes: it creates a stronger attachment, and it allows me to remove the parts for painting. Even parts that were glued on were attached with pins for strength. I plan on travelling with this model, so it’s important that it be able to stand up to a little jostling.

IMG_4895

IMG_4892

Gaso.Line 1:48 T-62 New hatch

I decided to design and print a new commanders hatch.

I had a Trumpeter kit handy, so I used that for measurements. If I were going to model this for production, it would be a more lengthy process involving research, photographs of the real article, more detailed base drawing construction, etc…

In this case, I just wanted to get the CAD model out for print ASAP due to a rapidly approaching deadline, so I modeled what I had, then scaled it down to 1:48 scale.

I may wait until I have the finished hatch in hand before I grind off the existing one on the turret.

Here you can see the original 1:35 scale model and the reduced 1:48 scale version.
hatch renders-2

And a quick Photoshop of the new hatch in place.
T62PARTS_TURRET with new hatch copy

We’ll see how it actually turns out. It should be here around April 6th, so stay tuned.

Thanks for looking!

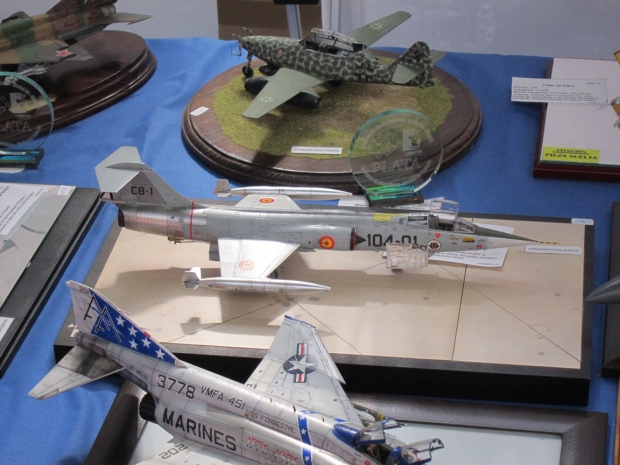
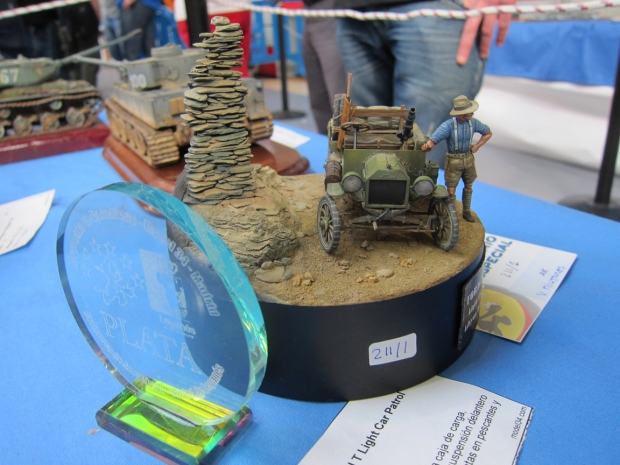
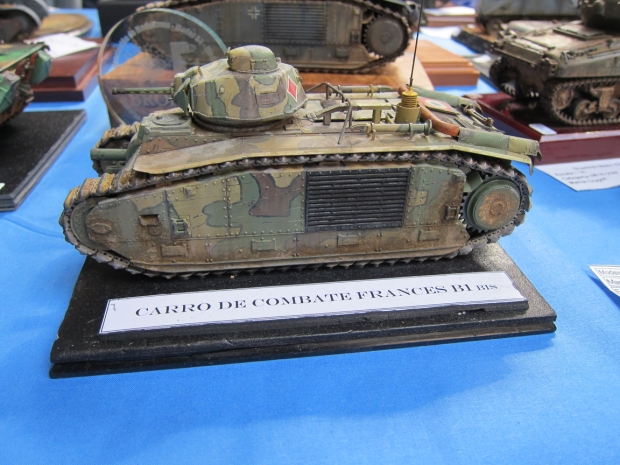
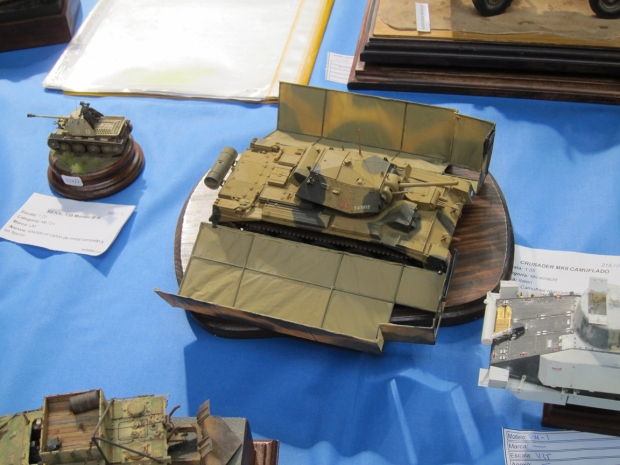
IV Concurso de Modelismo Estatico Leganes – Part 2: The Models

As promised, part II of my report from the IV Concurso de Modelismo Estatico Leganes Madrid.

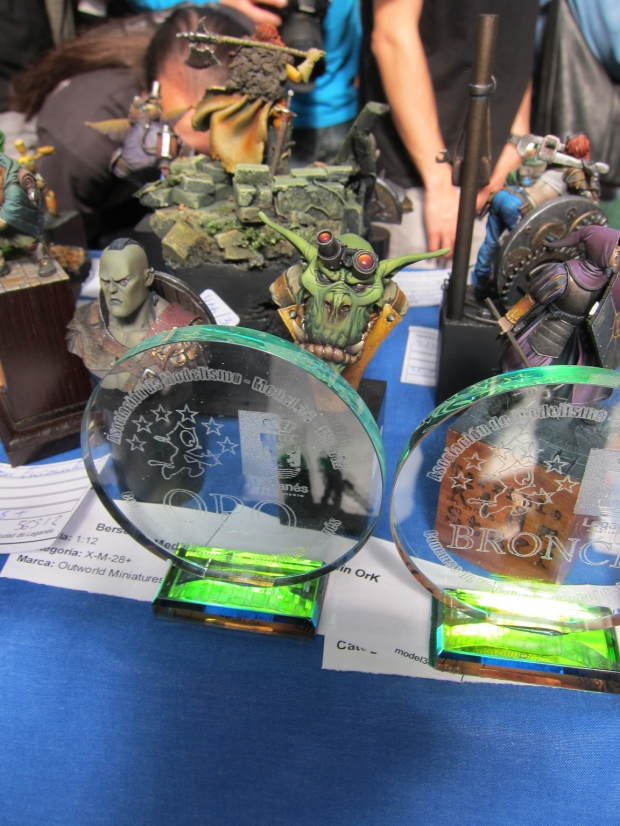
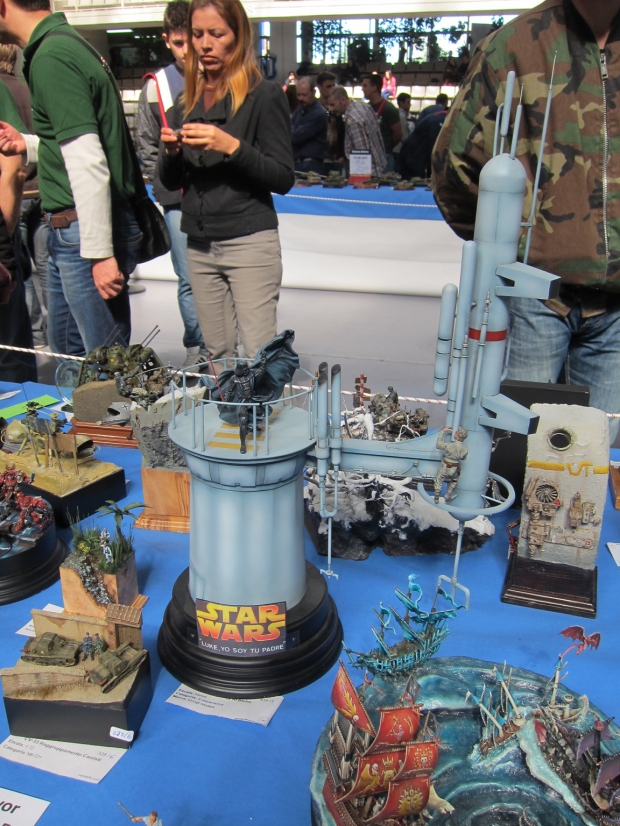
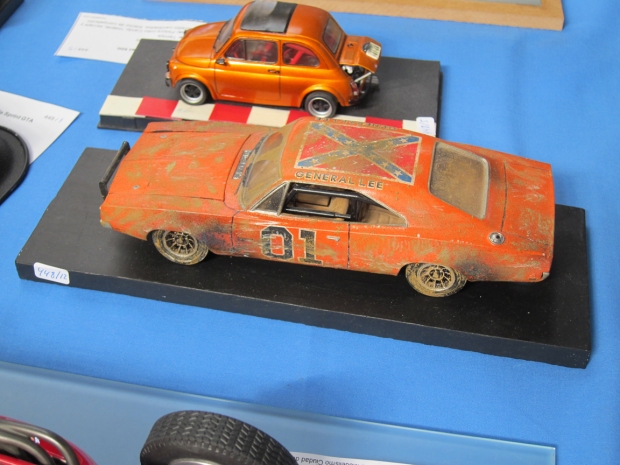
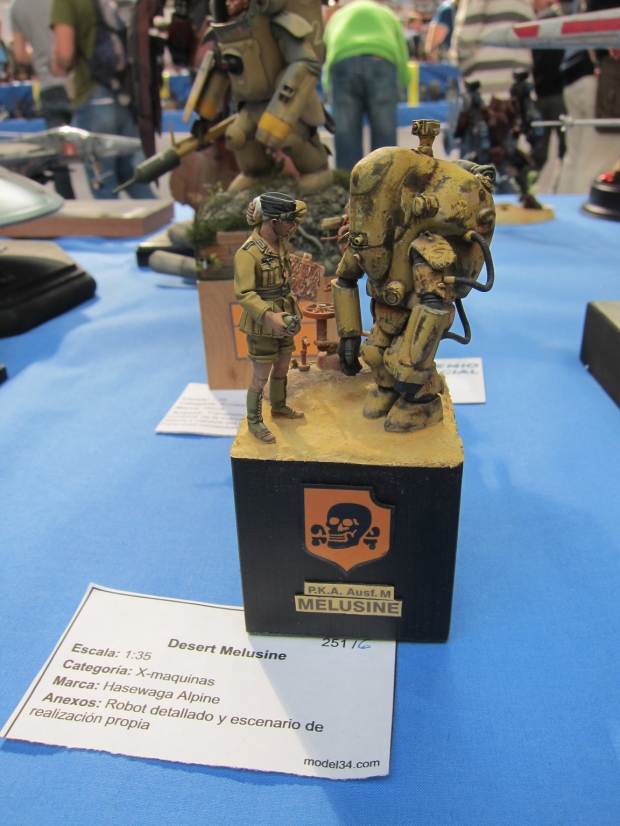
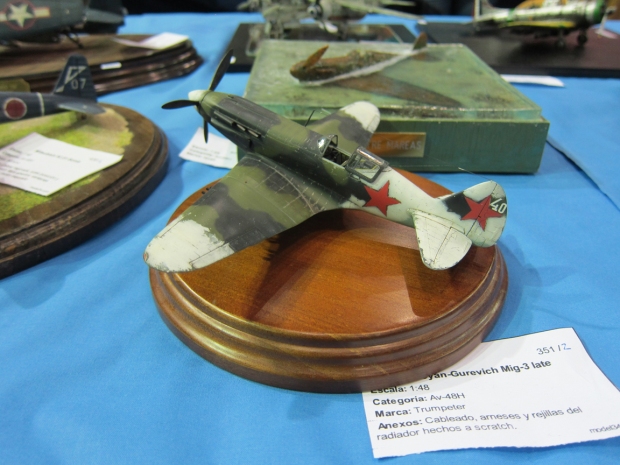
The models!

A quick reset…

Last weekend, Friday, Saturday and Sunday March 14th, 15th, and 16th, modelers, vendors and their friends and families gathered from all over Europe to attend the 4th annual Concurso de Modelismo Estatico in Leganes, Spain.

Lo prometido es deuda , la segunda parte de mi informe del IV Concurso de Modelismo Estatico Leganes Madrid.

Los modelos !

Un reinicio rápido …

Último fin de semana, viernes, sábado y domingo 14 de marzo , 15 ª, y 16 ª , modeladores , los vendedores y sus amigos y familias se reunieron de todas partes de Europa para asistir a la cuarta anual Concurso de Modelismo Estatico en Leganés, España .

Hosted by IPMS Madrid – Asociacion de Modelismo Estatico Leganes – chapter of the International Plastic Modelers Society, the show brought visitors and locals alike to the Pabellon de Europa to see some of the worlds best modelers displaying their latest projects, to pick up the latest figure or accessory, catch up with old friends, see a demo by a well known modeller, eat, drink, and generally celebrate life and the hobby.

Organizado por IPMS Madrid – Asociacion de Modelismo Estatico Leganes – capítulo de la Sociedad Internacional de Creadores de modelos de plástico , la feria reunió a los visitantes y lugareños por igual para el Pabellón de Europa para ver algunos de los mundos mejores modeladores de mostrar sus últimos proyectos , recoger la última cifra o accesorio, ponerse al día con viejos amigos , ver una demostración por un modelista conocido , comer, beber , y en general celebrar la vida y la afición.

A suburb of Madrid, Leganes lies about a 20 minute train ride from the city of Madrid proper. With easy travel access, affordable accommodations, and an excellent venue, the show is quickly becoming on of Europe’s must-attend shows. I don’t know the total number of entrants, but the quantity and quality of the displays was phenomenal!

A las afueras de Madrid, Leganés se encuentra a unos 20 minutos en tren desde la ciudad de Madrid apropiada. Con acceso fácil viajar, alojamiento asequible y un lugar excelente , el espectáculo se está convirtiendo rápidamente en el de los espectáculos de obligada asistencia de Europa. No sé el número total de participantes, pero la cantidad y la calidad de las pantallas fue fenomenal !

As the model show was opened to the public at no charge, and there was a high level of public interest, it was good to see that the model display tables were set behind ropes to encourage people to keep a safe distance. Model 34, the local IPMS chapter and host of the show, posted guardians at the tables to keep an eye on the models and spectators. I was asked at one point not to set my camera to close to the models. Even with all of these precautions, apparently some models did sustain some damage. Overall however, I felt that the organizers did a great job, definitely their due-diligence, especially considering the sheer number of visitors that passed through (I saw a newspaper report that put the estimate at 16,000!), to safeguard the models on display.

Como la demostración del modelo fue abierto al público sin costo alguno , y había un alto nivel de interés público, que era bueno ver que las mesas de exhibición modelo se establecieron detrás cuerdas para animar a la gente a mantener una distancia segura . Modelo 34 , el capítulo IPMS local y anfitrión del programa , publicado tutores en las mesas para mantener un ojo en los modelos y los espectadores . Se me pidió en un momento de no fijar mi cámara a cerca de los modelos. A pesar de todas estas precauciones , al parecer, algunos modelos tenían sostienen algunos daños . En general, sin embargo , me pareció que los organizadores hicieron un gran trabajo , sin duda su diligencia debida , sobre todo teniendo en cuenta el gran número de visitantes que pasaron por ( vi un informe de prensa que puso la estimación en 16.000 !) , Para salvaguardar los modelos en exhibición .

In the end, working in the natural light and without a proper tripod or close access to the models, I wasn’t able to get a good photograph of every model on display. If you don’t see a photo here of something that really stood out to you, chances are it stood out to me too, but I just couldn’t get a good enough photograph of it to post it here. There’s always next year!

On to the models then!

In no particular order…

Al final, trabajando en la luz natural y sin trípode adecuado o acceso cercano a los modelos , yo no era capaz de conseguir una buena fotografía de todos los modelos en exhibición. Si usted no ve una foto aquí de algo que realmente se destacó para usted, lo más probable es que se destacó para mí también, pero yo no podía conseguir una buena fotografía lo suficiente como para publicar aquí . Siempre hay el próximo año!

En los modelos de entonces!

En ningún orden en particular …

IMG_3991

IMG_3990

IMG_3986

IMG_3980

IMG_3977

IMG_3975

IMG_3974

IMG_3973

IMG_3971

IMG_3970

IMG_3967

IMG_3963

IMG_3959

IMG_3958

IMG_3954

IMG_3951

IMG_3949

IMG_3944

IMG_3931

IMG_3922

IMG_3917

IMG_3916

IMG_3909

IMG_3904

IMG_3902

IMG_3894

IMG_3892

IMG_3888

IMG_3887

IMG_3883

IMG_3879

IMG_3877

IMG_3873

IMG_3870

IMG_3869

IMG_3866

IMG_3857

IMG_3855

IMG_3854

IMG_3850

IMG_3846

IMG_3840

IMG_3835

IMG_3831

IMG_3827

IMG_3825

IMG_3821

IMG_3816

IMG_3815

IMG_3807

IMG_3799

IMG_3796

IMG_3789

IMG_3787

IMG_3776

IMG_3773

IMG_3768

IMG_3762

IMG_3761

IMG_3760

IMG_3753

IMG_3750

IMG_3747

IMG_3744

IMG_3742

IMG_3740

IMG_3735

IMG_3731

IMG_3729

IMG_3716

IMG_3712

IMG_3704

IMG_3700

IMG_3693

IMG_3691

IMG_3690

IMG_3683

IMG_3678

IMG_3676

IMG_3674

IMG_3648

IMG_3646

IMG_3640

IMG_3639

IMG_3636

IMG_3632

IMG_3630

IMG_3629

IMG_3627

IMG_3621

IMG_3620

IMG_3612

IMG_3610

IMG_3606

IMG_3590

IMG_3552

IMG_3549

IMG_3548

IMG_3542

IMG_3541

IMG_3539

IMG_3536

IMG_3532

IMG_3531

IMG_3527

IMG_3521

IMG_3516

IMG_3513

IMG_3503

IMG_3502

IMG_3495

IMG_3483

IMG_3471

IMG_3461

IMG_3456

IMG_3794

I will try to add notes to the images above as I have time over the next week.

Again – it was an incredible show. I left feeling inspired and motivated to produce, which is exactly what a show should do. Thanks again to the people of Leganes, Model 34, show organizers, volunteers, vendors and modelers who made it all possible.

Next – the people.

Thanks for looking and stay tuned.

Gaso.Line 1:48 T-62 part II – Tracks

The more I get into this little kit the more I like it. It builds fast, has great detail, and offers a wide range of finishing possibilities.

It is a resin kit though, so a bit of a different build mindset will pay off in the long run. Take the tracks for example. Long, thin cast resin parts are prone to warping. They can often be straightened by soaking them in hot water (or “heat soaking” with a hair drier), bending against the warp and holding while they cool. I tried the hot water method, but the tracks had enough mass and structure that they resisted my attempts to straighten them this way. I thought about clamping them to the hull and using cyanoacrylate to hold them in place, but the thought of permanently bonding them on before paint, as well as the need to use complicated spacer blocking to prevent clamping on the fragile track link ends gave me reason to keep looking for a solution.

In the end, the kit designer provided the inspiration for the solution I chose. In the image below, you can see the warpage of the tracks.
IMG_4718

You can also see the two countersunk holes in the bottom of the hull. Those holes allow the modeller to screw the hull top and bottom together. I didn’t use them, but instead decided to permanently bond the hull together due to seam work on the glacis. I thought it was a neat design feature though, and wondered if I could use the same idea to attach the tracks, using screws to clamp the tracks flat against the hull, while also allowing me to keep them removable for finishing. Two birds, one SABOT round etc!

I looked through my tool stash for my miniature tap and die sets and found an old 2-56 tap and die set from Kadee (railroad modelers will recognize the brand) and some 2-56 machine screws.
IMG_4733

I drilled and tapped the hull for the 2-56 screws, then cleaned the holes with a 2-56 screw.
IMG_4721
IMG_4722
IMG_4723

Then I used the 2-56 clearance drill to drill the holes on the kit tracks.
IMG_4725

Here you can see the secured track on the right and the out-of-the-box track on the left.
IMG_4726

Here she sits.
IMG_4736

I think it will still require a bit of tuning with heat and pressure to get the ground contacting track links to rest properly, but I am happy with the result.
IMG_4740

I’m really enjoying this build and I want to thank my friend Jose Luis Lopez Ruiz again for the gift.

Next up – the turret!

Thanks for looking.

IV Concurso de Modelismo Estatico Leganes – Part 1: Venue and Vendors

4th Annual Static Model Contest – Leganes, Spain

Last weekend, Friday, Saturday and Sunday March 14th, 15th, and 16th, modelers, vendors and their friends and families gathered from all over Europe to attend the 4th annual Concurso de Modelismo Estatico in Leganes, Spain.

Hosted by IPMS Madrid – Asociacion de Modelismo Estatico Leganes – chapter of the International Plastic Modelers Society, the show brought visitors and locals alike to the Pabellon de Europa to see some of the worlds best modelers displaying their latest projects, pick up the latest figure or accessory, catch up with old friends, see a demo by a well known modeller, eat, drink, and generally celebrate life and the hobby.

A suburb of Madrid, Leganes lies about a 20 minute train ride from the city of Madrid proper. With easy travel access, affordable accommodations, and an excellent venue, the show is quickly becoming on of Europe’s must-attend shows. I don’t know the total number of entrants, but the quantity and quality of the displays was phenomenal!

The Venue
(photo from Panoramio.com)
pabellon

IMG_4026

A quick tour of the vendors. Not all of them are pictured here, as I couldn’t get a good picture of every one.

Robotines –
IMG_3266
IMG_3293
IMG_4071
http://www.robotines.com/en/

Alexander Glass of Uschi Van der Rosten giving a demo on Saturday at the Robotines booth. You should definitely stop by his website to check it out! There is a lot of useful info there as well as inspiring images and articles. The section on Mr Hobby primers and thinners alone is worth the clicks.
IMG_3335
http://www.uschivdr.com/

The good people of Accion Press / Euromodelismo / Panzer Aces were there with their high-quality publications.
IMG_3268
http://www.euromodelismo.com/shop1/en/

Alabardero figures was there with a very interesting “behind the scenes” display. It was great to see molds, original patterns, and castings that modelers don’t usually get to see.
IMG_3277
IMG_3280
IMG_3282
IMG_3289

Andrea Miniatures had a well stocked booth. Their representatives were eager to talk about their new products and were extremely helpful! They even offered to return the next day with English editions of whatever I might be interested in.
IMG_4065
IMG_3264
http://www.andreadepotusa.com/en/1/andrea-miniatures.html

Carmina Hobbies with a VERY well-stocked booth. I may or may not have procured a sizable quantity of items there…
IMG_4056
http://www.carminahobbys.com/

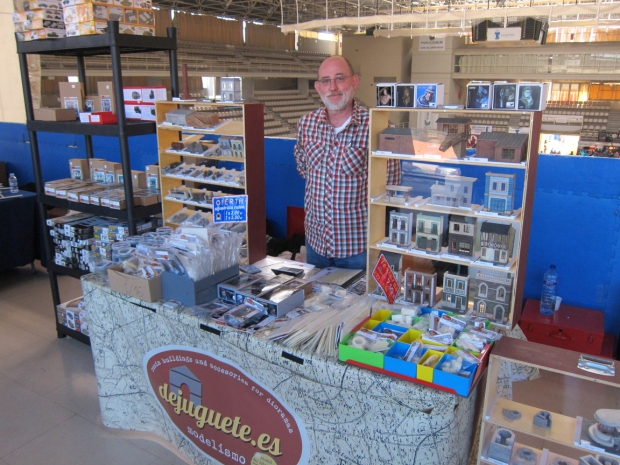
Dejuguetes was there too with a great display. It was too bad that they were placed on a floor above the main level where they didn’t get a lot of foot traffic. Dejuguetes produces, among other things, some really nice building facades and diorama accesories.
IMG_3999
IMG_4002
IMG_4005
http://dejuguete.es/en/

Dolman Miniatures had an interesting booth with some very nice graphic design on display. Similar to Alabardero, they showcased some of the actual design process.
IMG_4011
IMG_4016
http://www.dolmanminiatures.com/index.php/en/

Mac One Models had a very nice booth presenting various diorama and vignette items, as well as something I was very interested in: their Spanish Civil War T-26 conversion kit. All were very reasonably priced and demonstrated an understanding of the value that the modeller places on time.
IMG_4066
IMG_3257
IMG_3263
IMG_3251
http://www.maconemodels.com/venta/index.php

I picked up this figure from Art Girona. They patiently allowed me to lurk around their booth for quite a while…
IMG_3276
IMG_3274

home

Nocturna Models was there with their always stunning display of incredible figures. These guys and gals have definitely raised the bar on presentation and design of every aspect of figure modeling. From the dynamic sculpts to the top-notch presentation in packaging, these figures are awesome! Unfortunately I came away from their booth empty-handed due to a pesky credit card chip / PIN issue. Next year!
IMG_3245
IMG_3243
IMG_3246
IMG_3247
IMG_3298
http://nocturnamodels.com/

Scale 75 was giving another demo this year. this is another company that has really elevated the art of modelling presentation. I don’t know if it’s Spain’s “artistic DNA” or the popularity of figure painting in Europe that is the reason for the high level of craft from these Spanish figure companies. Whatever it is, it’s great to see the art being elevated to such a high standard.
IMG_3294
http://www.scale75.com/

Nimix
IMG_3237
IMG_3238

Raul Perez Muñoz of Make Hobby – with a full lineup of BlackDog miniatures, got a little bit of my hobby budget. Unfortunately I didn’t get a picture of their booth. I guess I’ll just have to go back next year.

Fundacion Infante de Orleans had a neat aviation themed display.
IMG_3235

FIO

Various reenactment and cosplay groups were in attendance too, roaming the crowds providing photo-ops.
IMG_3437
IMG_3283

Part 2 will focus on models and people of this fantastic show.

Stay Tuned and thanks for looking!

GasoLine 1:48 scale T-62

I recently had the pleasure of spending a morning in the workshop of the talented and affable Jose Luis Lopez Ruiz.

JLLR-1

Jose Luis is a well-known Spanish modeler who is perhaps best known for his pioneering use of the black and white technique. His work can be seen regularly in Panzer Aces magazine, among others, and on sites like Missing Lynx. If you spend any time on the Missing Lynx forum you will recognize his T-55 Enigma:
2-27

Over a nice Spanish coffee and a cupcake, Jose suggested that (among other things – stay tuned for a more in-depth post about our chat) I take up 1:48 scale armor. He explained that painting in 1:48 scale will change the “scale” that you see things in, driving you to refine your technique and control, with the idea being that once you move back to 1:35 scale, you will continue to work in 1:48 scale in your mind, thus producing finer detail in your painting.

It seemed to make sense and I was eager to try it, but I think Jose thought I needed a little more nudging. He asked me what subjects I like to build, and as soon as I replied “Modern Soviet stuff” he disappeared into another room. After a minute or so he returned with a small white cardboard box, which he held out to me with a boyish smile on his face.

“Here – now you build in 48!”

It was a T-62 by Gaso.Line Models!

Touched by his generosity, and with a genuine desire to see where this experiment would lead (I had become increasingly dissatisfied with the over-sized chipping and scratching on my SU-85 and thought that this seemed like a great way to refine my technique) I accepted his gift and committed to completing the project by May 20th – Jose’s birthday.

Gaso.Line’s 1:48 scale T-62 is molded in a pale green polyurethane resin. It comes with a turned aluminum barrel, a spring, and some brass wire for forming the headlight guards. Detail throughout is very nice, but a few areas of the upper hull showed signs that the mold was wearing a bit. The tracks were slightly warped, but nothing that hot water and clamping wouldn’t take care of.

T62BOX1
T62PARTS1
T62PARTS_HULL
T62PARTS_HULL-REAR
T62PARTS2
T62PARTS_BARREL
T62PARTS_TRACKS
T62PARTS_TURRET

The details on the glacis plate were a little distorted due, I believe, to mold wear, so I decided to sand it smooth and add a sheet styrene plate to re-face the area and serve as a basis for the addition of my own replacement details.

T62PARTS_HULL-GLACIS

This required cutting through the fenders where they attached to the hull so that I could slide the new glacis plate under them.

T62_BUILD_GLACIS CUT

The headlight mounts were cut off, holes were drilled in the bottoms of the headlights, and corresponding holes were drilled in the new glacis plate. A new splash guard was cut from styrene and wood texture was added by scraping the face with a razor saw.

T62_BUILD_LIGHTS WIRE

I also decided that the engine deck mesh screens were due for replacement. I used a motor tool to cut away the molded screens while holding the upper hull over the end of a vacuum cleaner hose to catch the resin dust. I then replaced them with small pieces of brass screen that I roughed up a bit to simulate a well-worn vehicle.

T62_BUILD_REAR DECK-1
T62_BUILD_REAR DECK-SCREENS

At that point the upper and lower hulls were joined.

T62_BUILD_END DAY 1

Next up: hull details and suspension.

Stay tuned!

PANZER ACES WWII Soviet Special Edition

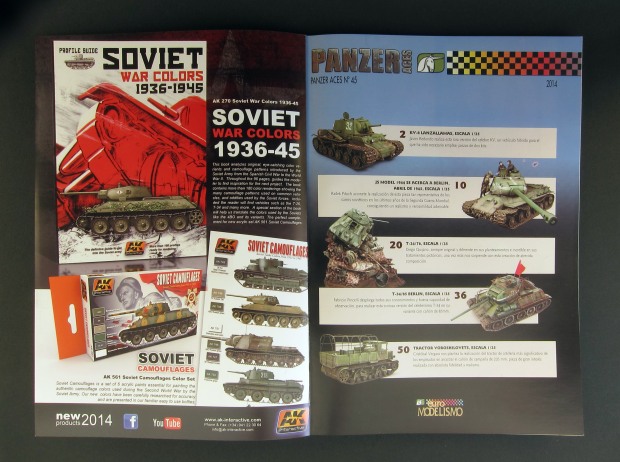
Just back from my trip to Leganes (Madrid) to attend the 4th annual Concurso de Modelismo Estatico, I want to take a few minutes to share a few images of the “WWII Soviet Special” issue (number 45) of Panzer Aces magazine. For those of you who don’t know Panzer Aces magazine (published by Accion Press of Madrid), I’ll start off by saying that the quality of the models presented in this bi-monthly title is of the highest level. Modelers Fabrizio Pincelli, Jose Luis Lopez Ruiz, Chris Jerrett, Cristobal Vergara, Radek Pituch, Mig Jimenez and many more supply content on a regular basis. The photography is excellent, with just the right balance of step-by-step photo essays and overall shots to give a sense of the finished piece.

This issue focuses on Soviet armor of WWII. Subjects include:

KV-8 Flamethrower by Javier Redondo
JS2 in Berlin by Radek Pituch
T-34/76 by Diego Quijano
T-34/85 by Fabrizio Pincelli
Voroshilovets Tractor by Cristobal Vergara

The text for each article begins with the customary historical background and transitions quickly into the build and finishing phase. Specific product call-outs are included for those who find that helpful, but I don’t get the impression that the magazine is one long product advertisement. Each author shares his own preferred finishing method and products. The result is exposure to a variety of materials and processes, which I think is a positive thing for modelers a well as manufacturers and suppliers, in addition to being healthy for the publisher – but look at me editorializing!

Who wants to see pictures?

PA45COVER

PA45INDEX

PA45KV8

PA45JS2

PA45T3485

Bravisimo! to the crew at Accion Press and Panzer Aces magazine: Well done! You have me reaching for something in 4 BO…

Panzer Aces is published in both English and Spanish, so be sure to select the English option if that’s what you’re after. My copy happens to be Spanish since I picked it up in Spain and I’m able to read Spanish.

An English copy, shipped to the US will set you back about $20. Hopefully as Accion Press titles become more widely available through distributors in the US, the price will come down a little. Accion Press offers many other titles in their lineup. Look for more reviews in the near future.

http://www.euromodelismo.com/shop1/en/37-panzer-aces-es (English available at the upper right corner)

https://www.facebook.com/PanzerAces.Magazine

Rapid Prototyping and model accessory design

LEO 2 PLUGS PRINTED euro copy

There has been a lot of buzz lately surrounding Rapid Prototyping, or as it’s commonly called: “3D printing”, in the modeling community. While it’s true that it is an exciting technology, we’re still a very long technological journey away from practical and affordable applications for the average modeler. The day you can take your Iphone21 S into your local museum, scan that FW-190 and print out a model kit on your Mr. Make-a-Part 2000 is still a long way away. Oh well – what’s the harm in dreaming? It’s the dream that inspires…

There are, however, many practical applications for 3D printing technology today. One of these applications is the creation of masters for aftermarket resin accessories. Companies like Eduard (for their Brassin range) Aires, DEF Models, Live Resin, HAD Models, Falcons Bench and many more, are seeing the value in creating models in CAD software and using those models to have masters printed. But creating these models is not as simple as scanning the real item and punching the scale into a computer. There’s still no “make model” button. It takes experience and skill to design a scale model for printing, one which has value beyond just holding something “neat” in your hand.

As a daily CAD user, I’ve developed the “flow” and practices that allow me to quickly break down complex shapes and surfaces to create a plan for modelling them efficiently, and the skills to put that plan into action in various software packages. As a modeler and a product designer, I can look at a part and evaluate what a user is likely to want or expect in a product. As an industrial designer and former production machinist (who also happens to have done a lot of resin casting), I’ve developed the ability to look at a part and see it in terms of a production process. As someone with a full-time job and little time for my hobby, let alone a cottage industry aftermarket business, I know that efficiency is something that MUST be designed into the production process at every opportunity if the effort is to remain sustainable and enjoyable over the long run.

So when an aftermarket company approached me and expressed an interest in having some very small detail parts modeled in CAD and printed for the purpose of using those prints as masters for casting, I knew that I could leverage my skills and background against the new technology to help this company bring their product to market as efficiently as possible while creating a high quality product for the end user, the modeler.

The first step was to define the end goal – the deliverable:

Masters for resin casting 1:35 scale Leopard tank mantlet plugs for the Leopard 1 and 2 (2 types of plugs)
8 plugs per vehicle.

1:1 mantlet plug
1017136_576391419117039_1254604875_n

Easy! But let’s look at it through the perspective of the company who would be offering these pieces.
They would need to select a casting vendor (or plan on casting them themselves) and have the parts cast. We’re talking about some pretty tiny parts: less than 2MM in diameter with details less than .25MM thick! The design of the parts should facilitate easy handling for the caster, packaging, and the modeler. It was an easy decision to design a “sprue” arrangement to hold the part and make casting and handling easier. I figured that it would be a negligible amount of added print time, material, and casting resin to extend the sprue enough to add 2 spares of these tiny parts to the sprue as one of these parts from each set was bound to be sacrificed to the “carpet monster”. OK, so now we had a sprue, or more accurately a casting block, that was about 30MM long and still only about 3MM wide. That’s hardly enough to mix a batch of resin, and mixing that small of a batch is likely to end up with an “off” mixing ratio, leading to uncured, wasted material and time. Casters typically overcome this problem with small molds by making “gang” molds. These are molds that produce multiple copies of an item with each casting cycle. This is done by making one mold of the original part, casting multiple copies, then making a mold of those parts that will create multiple copies of the item with each pour. Often detail is lost, shrinkage accumulates, and the product suffers. Overcoming the need for this multiple generation process is a perfect application for CAD and 3D printing! In CAD it’s a simple matter to pattern a feature or a body to create a “gang” master. I figured that if the caster could get 10 blocks of parts per pour, an economy of scale would be established immediately. After the main block is removed from the mold, the individual blocks could be snapped off of the “gang” block and dropped into packaging. All that was left was to add an additional bit of length so I could add a product number to each block, elevating the perceived level of quality, and we’d be ready to upload the file to the print bureau.

early block ideation
single block

I uploaded the file and sent a link to the aftermarket producer letting him know how to order his prints. I also uploaded the STL file (necessary for printing) and another common type of CAD file (for his archiving in the event of future work CAD needs) to DROPBOX and sent him the link to the files. At that time, I ordered an archival print for my own use. My part showed up a week later and it looked fantastic! It’s really amazing what the new SLA and SLS machines can do. Be aware that some finishing is still usually required to get smooth surfaces on the masters. A little knowledge and a good working relationship with the print bureau can help minimize the amount of work required to prep the prints for casting.

While 3D printing might not yet have reached full maturity, where a modeler just has to hit the magical “make part” button (don’t forget, I’ve only addressed the CAD model side of the equation – I haven’t even touched on the skills required to successfully operate a 3D printer) there are still some great applications for the technology, and advances in affordability, fidelity and ease of use are constantly being made. Who knows – it may not be long before you’ll have to look at your stash shelf to see if you have room before you hit that button again!

LEO 2 PLUGS PRINTED 2 copy

The Leopard 1 and Leopard 2 Mantlet plugs will be available soon from LeopardClub http://www.leopardclub.info
They will include photoetched retainer chains.
http://www.facebook.com/leopardfibel

I can be contacted at Peterjhamann@gmail.com , or https://www.facebook.com/PeterHamannModelServices

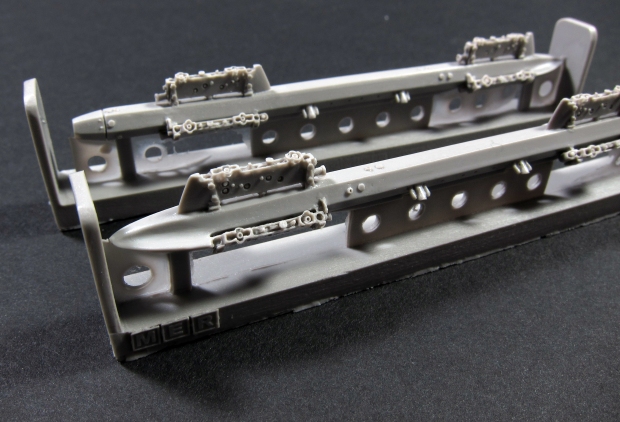
AEROBONUS 1:48 scale US NAVY Triple Ejector Rack TER-7 (A/A37B-5) and Multiple Ejector Rack MER-7 (A/A37B-6)

An airplane has found it’s way onto my desk!

Specifically Hasegawa’s 1:48 scale A-4E Skyhawk. Hasegawa produces some of the finest detailed and best fitting kits available, and the Skyhawk is definitely one of the cleanest-building, most well-detailed kits, out-of-the box, that I’ve ever had the pleasure of building. One thing it is lacking, as are almost all Hasegawa kits, is ordnance options. The kit includes auxiliary fuel tanks (drop tanks) and Skyhawk specific pylons, but no weapons or weapon racks, so aftermarket is a necessity if you want to hang anything that goes “BOOM”!

Fortunately Aires of the Czech Republic offers a solution. This prolific aftermarket company exploded onto the scene in 1995 with their first resin aircraft detail set for the Hasegawa Ju-87 Stuka. Since then they have continued to introduce new products at an astounding rate. Beginning with cockpit and engine sets, and later expanding into other areas, it seems that now there is no area of aircraft detail that remains unattended to by Aires. Recently they have begun to offer a line of more tightly focused detail items to help modelers fill in the “gaps” in their models and dioramas with items like seated and standing pilots, ordnance, airfield equipment, and pylons and racks. These items appear under the AEROBONUS name and are well worth a look.

Let’s take a look at 2 of these items:

AEROBONUS 1:48 scale US NAVY Triple Ejector Rack TER-7 (A/A37B-5)
AEROBONUS 1:48 scale US NAVY Multiple Ejector Rack MER-7 (A/A37B-6)

Cast in Aires typical grey polyurethane resin with excellent, well-cast detail…well really what else can I say? I don’t have measurements of the full scale articles, so I can’t comment on dimensional accuracy…wait wait! I hear you saying “Well then what is the point of a REVIEW if you don’t know if they’re accurate or not!?” Well dear reader, my intention is not to review the items in question. My desire is to share detailed pictures of what you get for your money. I’ll gladly let the discussion of accuracy take place in the nether-holes of the interwebs. Those places where experts roam unconstrained by human relations to freely engage in heated exchanges of opinion about such pressing matters as fractions of millimeters and thousandths of an inch.

Was that snarky? I’m sorry. Truly, I am. OK here are the numbers:

Actual product measurements:
LOA (length overall): 81.17MM / 3.196″
Width of the main housing: 4.25MM / .167″

OK – Pictures are way more fun!

Packaging
PACKAGING

The basics
MER

MER
MER OVERALL-2
MER DETAIL

Instructions
INSTRUCTIONS

Side-by-side with the Revell rendering of the same item.
REVELL VS AEROBONUS

TER
TER OVERALL

OK there ya go!

The modeler will need to add the short cable that runs from the AFT face of the ejector assembly to the main housing. Aires / AEROBONUS have provided a small indentation at the places where the modeler would drill a hole to add this – a nice touch!

These things look great and are very well detailed. I can’t wait to add them to my A-4.

NOT SO FAST!

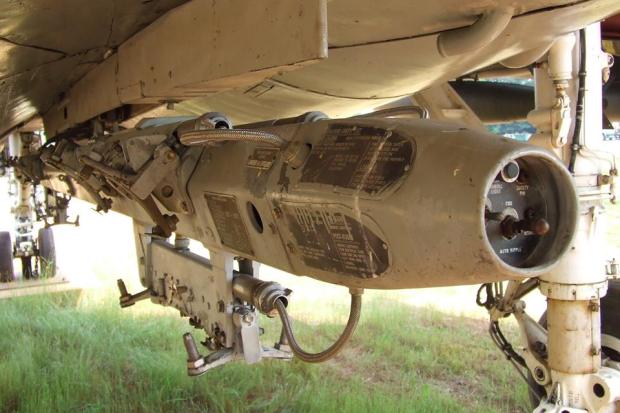
Dave Roof – Retired Marine Ordnanceman, owner of Flying Leathernecks Decals http://flyingleathernecksmodels.com/ and “Awesomerest guy ever!™” sent along these photos of a MER-7 with an A-6 Intruder attached to it. Thanks Dave! You can see in the pictures that the nose contours on this MER-7 are soft and rounded.
1528624_4111956014250_929067407_n
1922404_4111954774219_1926428335_n

So out came the sanding sticks and within a few minutes I had something that more closely resembled what I saw in Dave’s photos, as well as being closer to the Revell example.
Top – original AEROBONUS part
Center – Modified AEROBONUS part
Bottom – Revell part
ALTERED NOSE

It didn’t take long to do, and renders it a vast improvement over the Revell part in terms of detail. That being said, I think I would be happier if the nose on the AEROBONUS item were a bit “fatter”

OK well it turned into a bit of a proper interwebs review in the end, but I’m OK with that. If what I’ve posted helps the reader decide if the item is something that they want to add to the stash, I’ve done my job.

Dave was kind enough to permit me to post his additional photos, so here they are.
1002644_4111943333933_599409848_n

1517505_4111955134228_375931579_n

1236722_4111943533938_986134213_n

1184822_4111943653941_786106042_n

1926947_4111943133928_1389227223_n

1947530_4111943573939_1726455618_n

10009139_4111943613940_143709164_n

7577_4111956294257_1410893806_n

1978800_4111955854246_192003073_n

1653407_4111956094252_909919774_n

1508980_4111955454236_610022907_n

1097988_4111955734243_12823271_n

1969214_4111956494262_1552458344_n

1888755_4111955814245_1798704995_n

An upgrade for the ASU-85

One of the things that has always bugged me about my ASU-85 has been the total lack of detail on the interior of the crew hatches. Even though eventually I’ll add a seated Soviet tanker, which will help hide the smooth flat surface, I’ve decided to add some detail to help liven the area up a bit. I’ve also decided to try to attend the IPMS Madrid show in Mid-March (in a week and a half!) and since this is the only model I’ve completed in the 12 months since last years show, and thus, the only thing I’ll have to put on the tables, I’d better get cracking!

I looked for reference photos online and couldn’t find any. Sometimes this can be a good thing, as it (hopefully) means that no-one else can either, so the odds of someone pointing out an inaccuracy are minimal.

I started by planning the general layout of the detail and decided on a rim or gasket-like appearance, with a few fasteners and the suggestion of a handle and latching mechanism. Once I had the idea in mind it was time to get busy. My goal here was to try to complete the rework (minus paint and weathering) in one build session. I also wanted to leave the exterior of the hatch undisturbed since painting and weathering had been previously completed.

ORIGINAL HATCHES

I started by tracing the hatch with a .5MM mechanical pencil.

O5 PENCIL

TRACE THE HATCH 2

TRACED

Then I scanned the tracing and opened it in Adobe Illustrator.

ROTATE SCAN

I offset the scanned lines 2.5MM to the inside to account for the thickness of the pencil lead…

BASE RECTANGLE

then measured the kit hatch to confirm that the Illustrator drawing was sized correctly compared to the kit part.

MEASURE

I then added the gasket width and a few other features…

PATTERN

copied the pattern a few times and printed it out onto plain paper. Here you can see the kit hatch laying on the print to confirm the size.

PATTERNS PRINT

I attached the pattern to some .010 sheet styrene using double-sided tape.

PATTERN TO STYRENE

I started by punching out the inside corners with my new RP TOOLZ round punch and die (2MM diameter).

PUNCH THE CORNERS

And cut away the rest of the interior contours. Then it was just a matter of squaring everything up with a file and adding some details with styrene strip, punched bolt heads, stretched sprue and some thinly sliced styrene extrusions.

FINISHED HATCH 2

FINISHED HATCH-1

I think that the new hatch is a huge improvement over the original featureless kit part.

FINISHED HATCH IN PLACE

The whole process took a little bit over an hour and was well worth the time, in my opinion. Now to see if I can get it painted in time…

Stay tuned!