

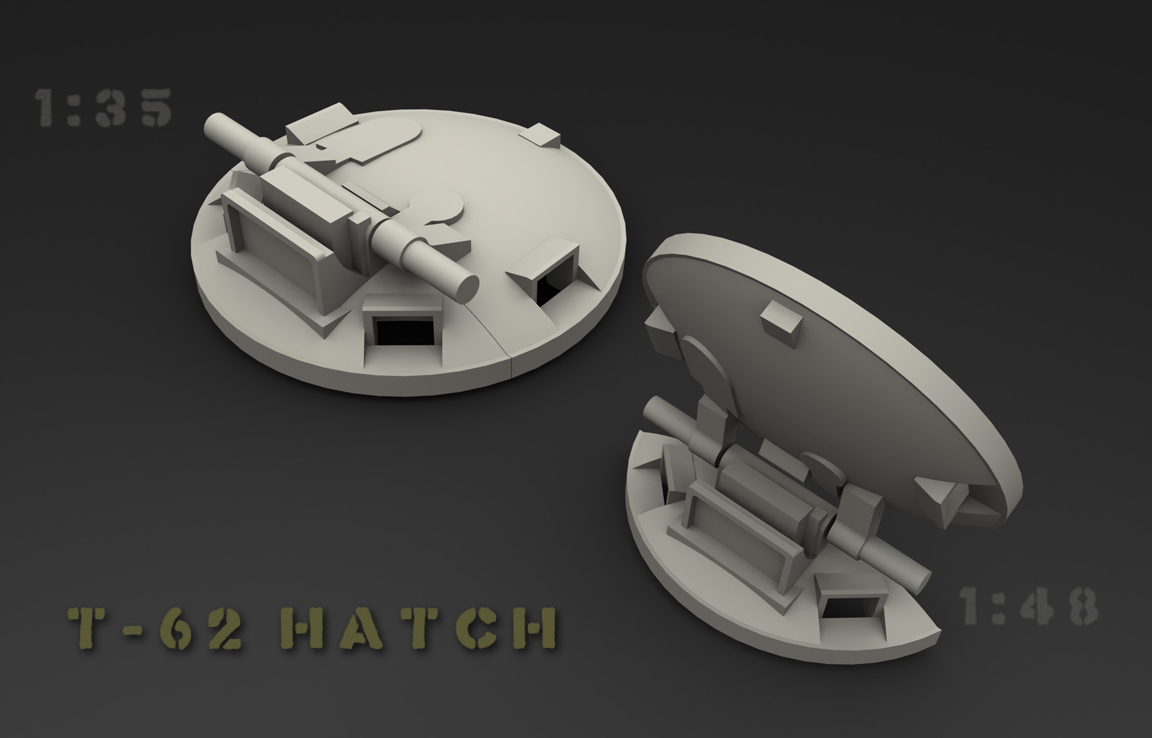
While waiting for my printed hatch to arrive…
I decided to go ahead and prep the turret for the new part, and to add the rest of the miscellaneous details to the turret and hull.
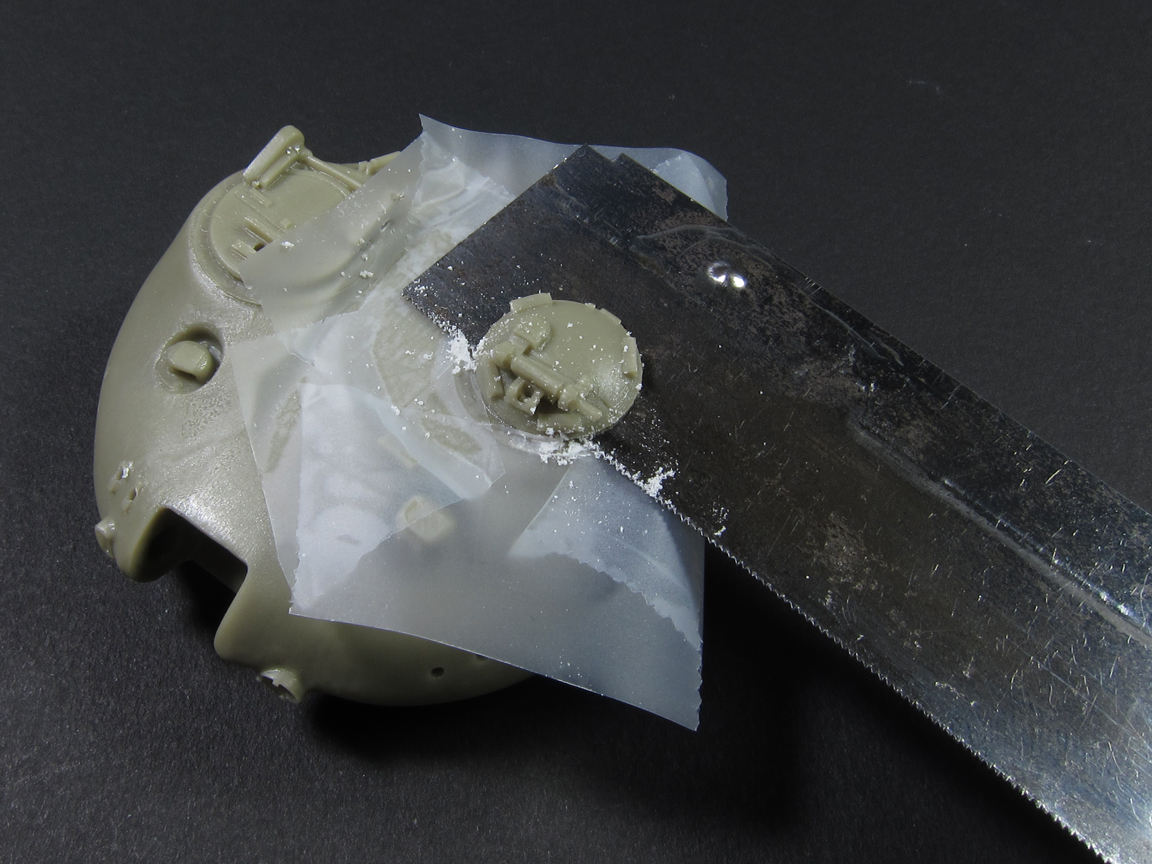
I started by cutting off the molded commander’s hatch. Tape was used to protect the surrounding details while a razor saw was used to remove the hatch.
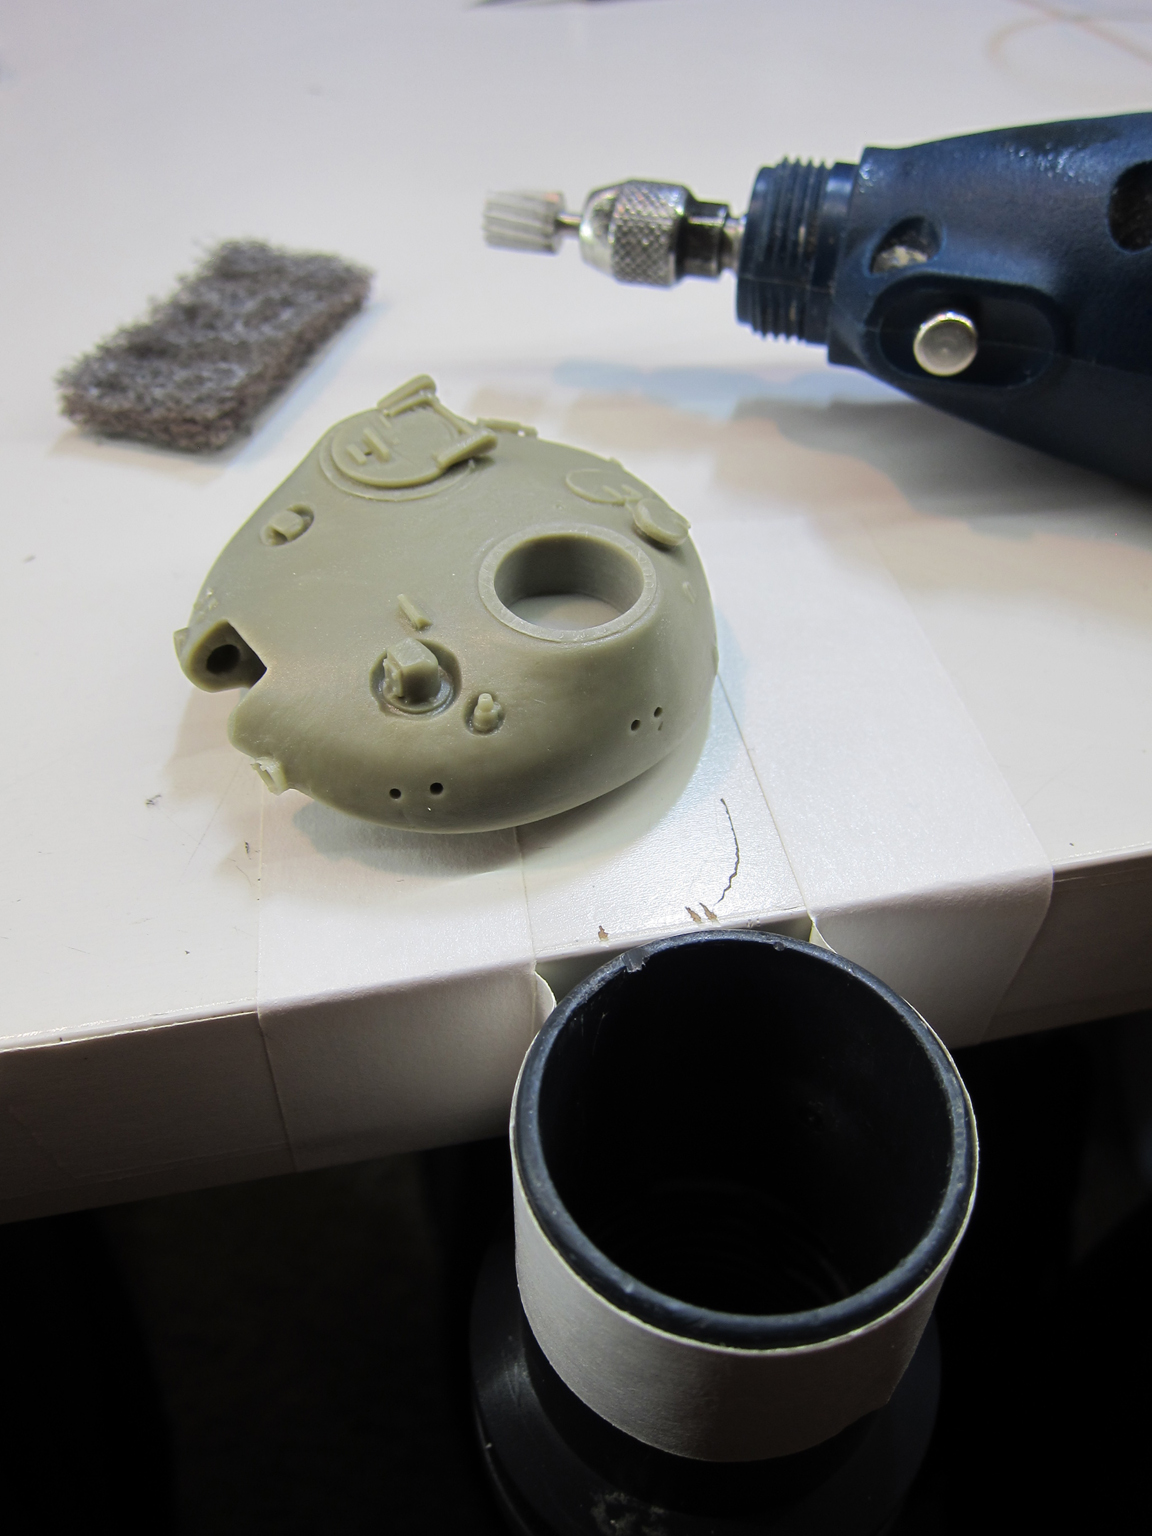
Then I used a motor tool to grind away a pocket that would allow me to mount a figure later. In the mean time, I plan on painting the pocket black to provide some depth and to create the illusion of a hollow turret.

When grinding resin, I like to hold the part over the open end of the hose with the vacuum running. I just tape the hose of my vacuum cleaner to the edge of the desk, or hold it between my knees. I really should put a screen over the nozzle!
I decided that I wanted the ring around the commander’s hatch to have more depth, so I fashioned a new version out of styrene using circle templates and an un-sharpened hypodermic needle. I cut the inner ring (representing the opening) first, but not all the way through. Then I placed the circle template back onto the styrene, but using the diameter slightly under the diameter of the final outer profile of the ring. This was done to guide the needle as I pressed the bolt pattern (to ensure a concentric bolt pattern). After I finished adding the bolt detail, I moved the circle template a final time so that the final outer profile diameter was in place, and finished cutting the piece from the sheet. Then all that was left was to carefully cut the center loose and attach the ring to the turret. Just to see what it looked like, I tack-glued the scrapped hatch in place.


I fashioned the turret grab handles from the kit supplied brass rod, and made new lifting hooks from styrene. I thought I had lost the kit parts, but it turned out that they were in the bag, I just didn’t recognize them!

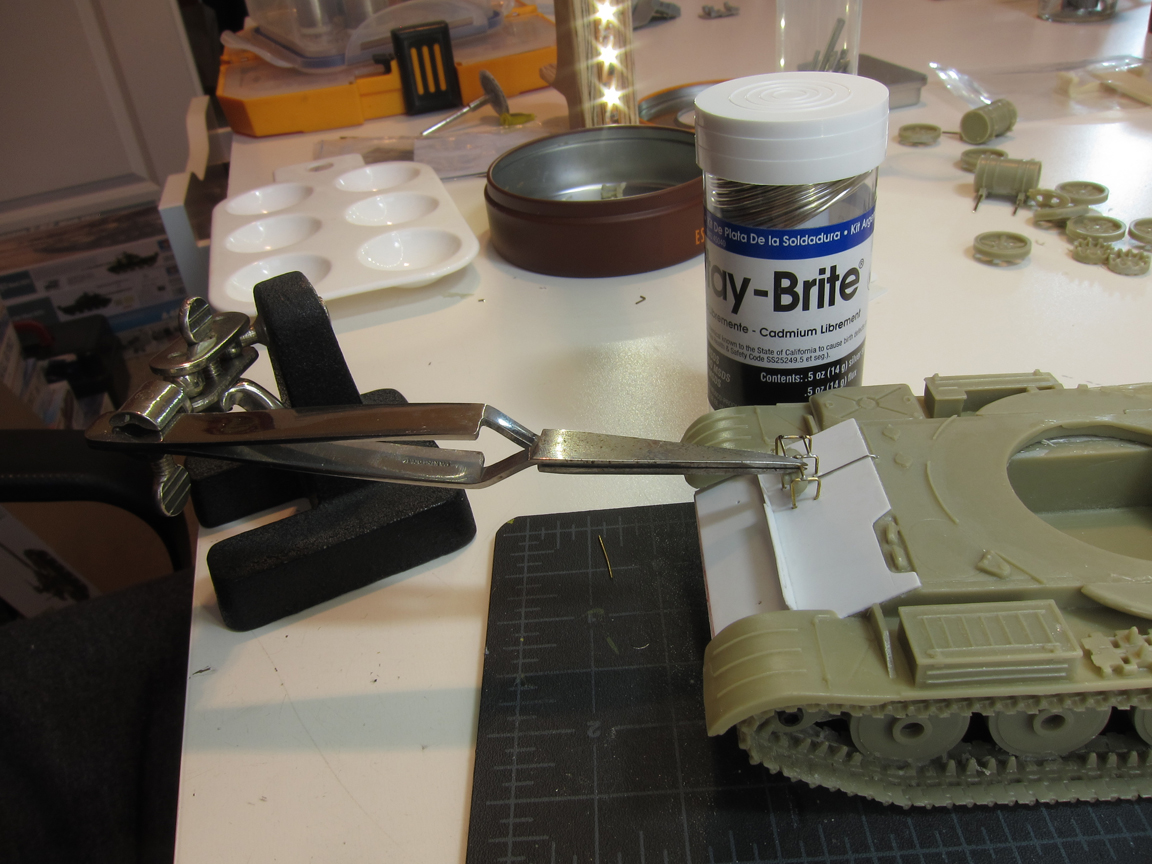
Headlight guards were bent from brass rod, inserted into pre-drilled holes, and the cross pieces soldered in place.

The rest of the small details were added. I used brass pins wherever possible. This serves two purposes: it creates a stronger attachment, and it allows me to remove the parts for painting. Even parts that were glued on were attached with pins for strength. I plan on travelling with this model, so it’s important that it be able to stand up to a little jostling.


