
Well after a visit to the local hobby shop down in Skyway, WA ( Skyway Models ) I was able to make some progress on the finish.
First I sprayed a layer of Tamiya clear (X-22) to aid in the application of the filters and washes. Next, a filter was mixed using the following oil paints: burnt umber, ultramarine blue, and a little bit of black. The mix was thinned with enamel thinners and applied to the whole model in a very thin layer.
The filter was allowed to dry overnight. Next, detailed washes were mixed using a mix of the same colors ( burnt umber and ultramarine and black ). After the detail washes had set up, they were blended ( stumped ) with a 6/0 brush.
After the detail washes dried, I used Vallejo Model Color 70822 German Camo Black Brown and a small piece torn from a scoth-brite pad to add chipping around the edges of the panels. A small brush was then used to add additional chipping in places where the scotch-brite pad wouldn’t reach.
After chipping, a mix of of black, white, and a touch of ultramarine blue and burnt umber oil paints were mixed to make a lighter and slightly warm blue gray that was a littlle bit lighter than the base color of the tank. This was applied to the top corners of the various panels and then blended down into the panels (except the top front hull panel where the lightest edge was athe bottom to have a high contrast area closer to the front of the tank. On the turret, the vision hatches were highlighted along the top edges and blended down . The goal with the oil gradients was to restore some of the gradients that were added in the airbrushing stage, but which were lost with the application of the filters.
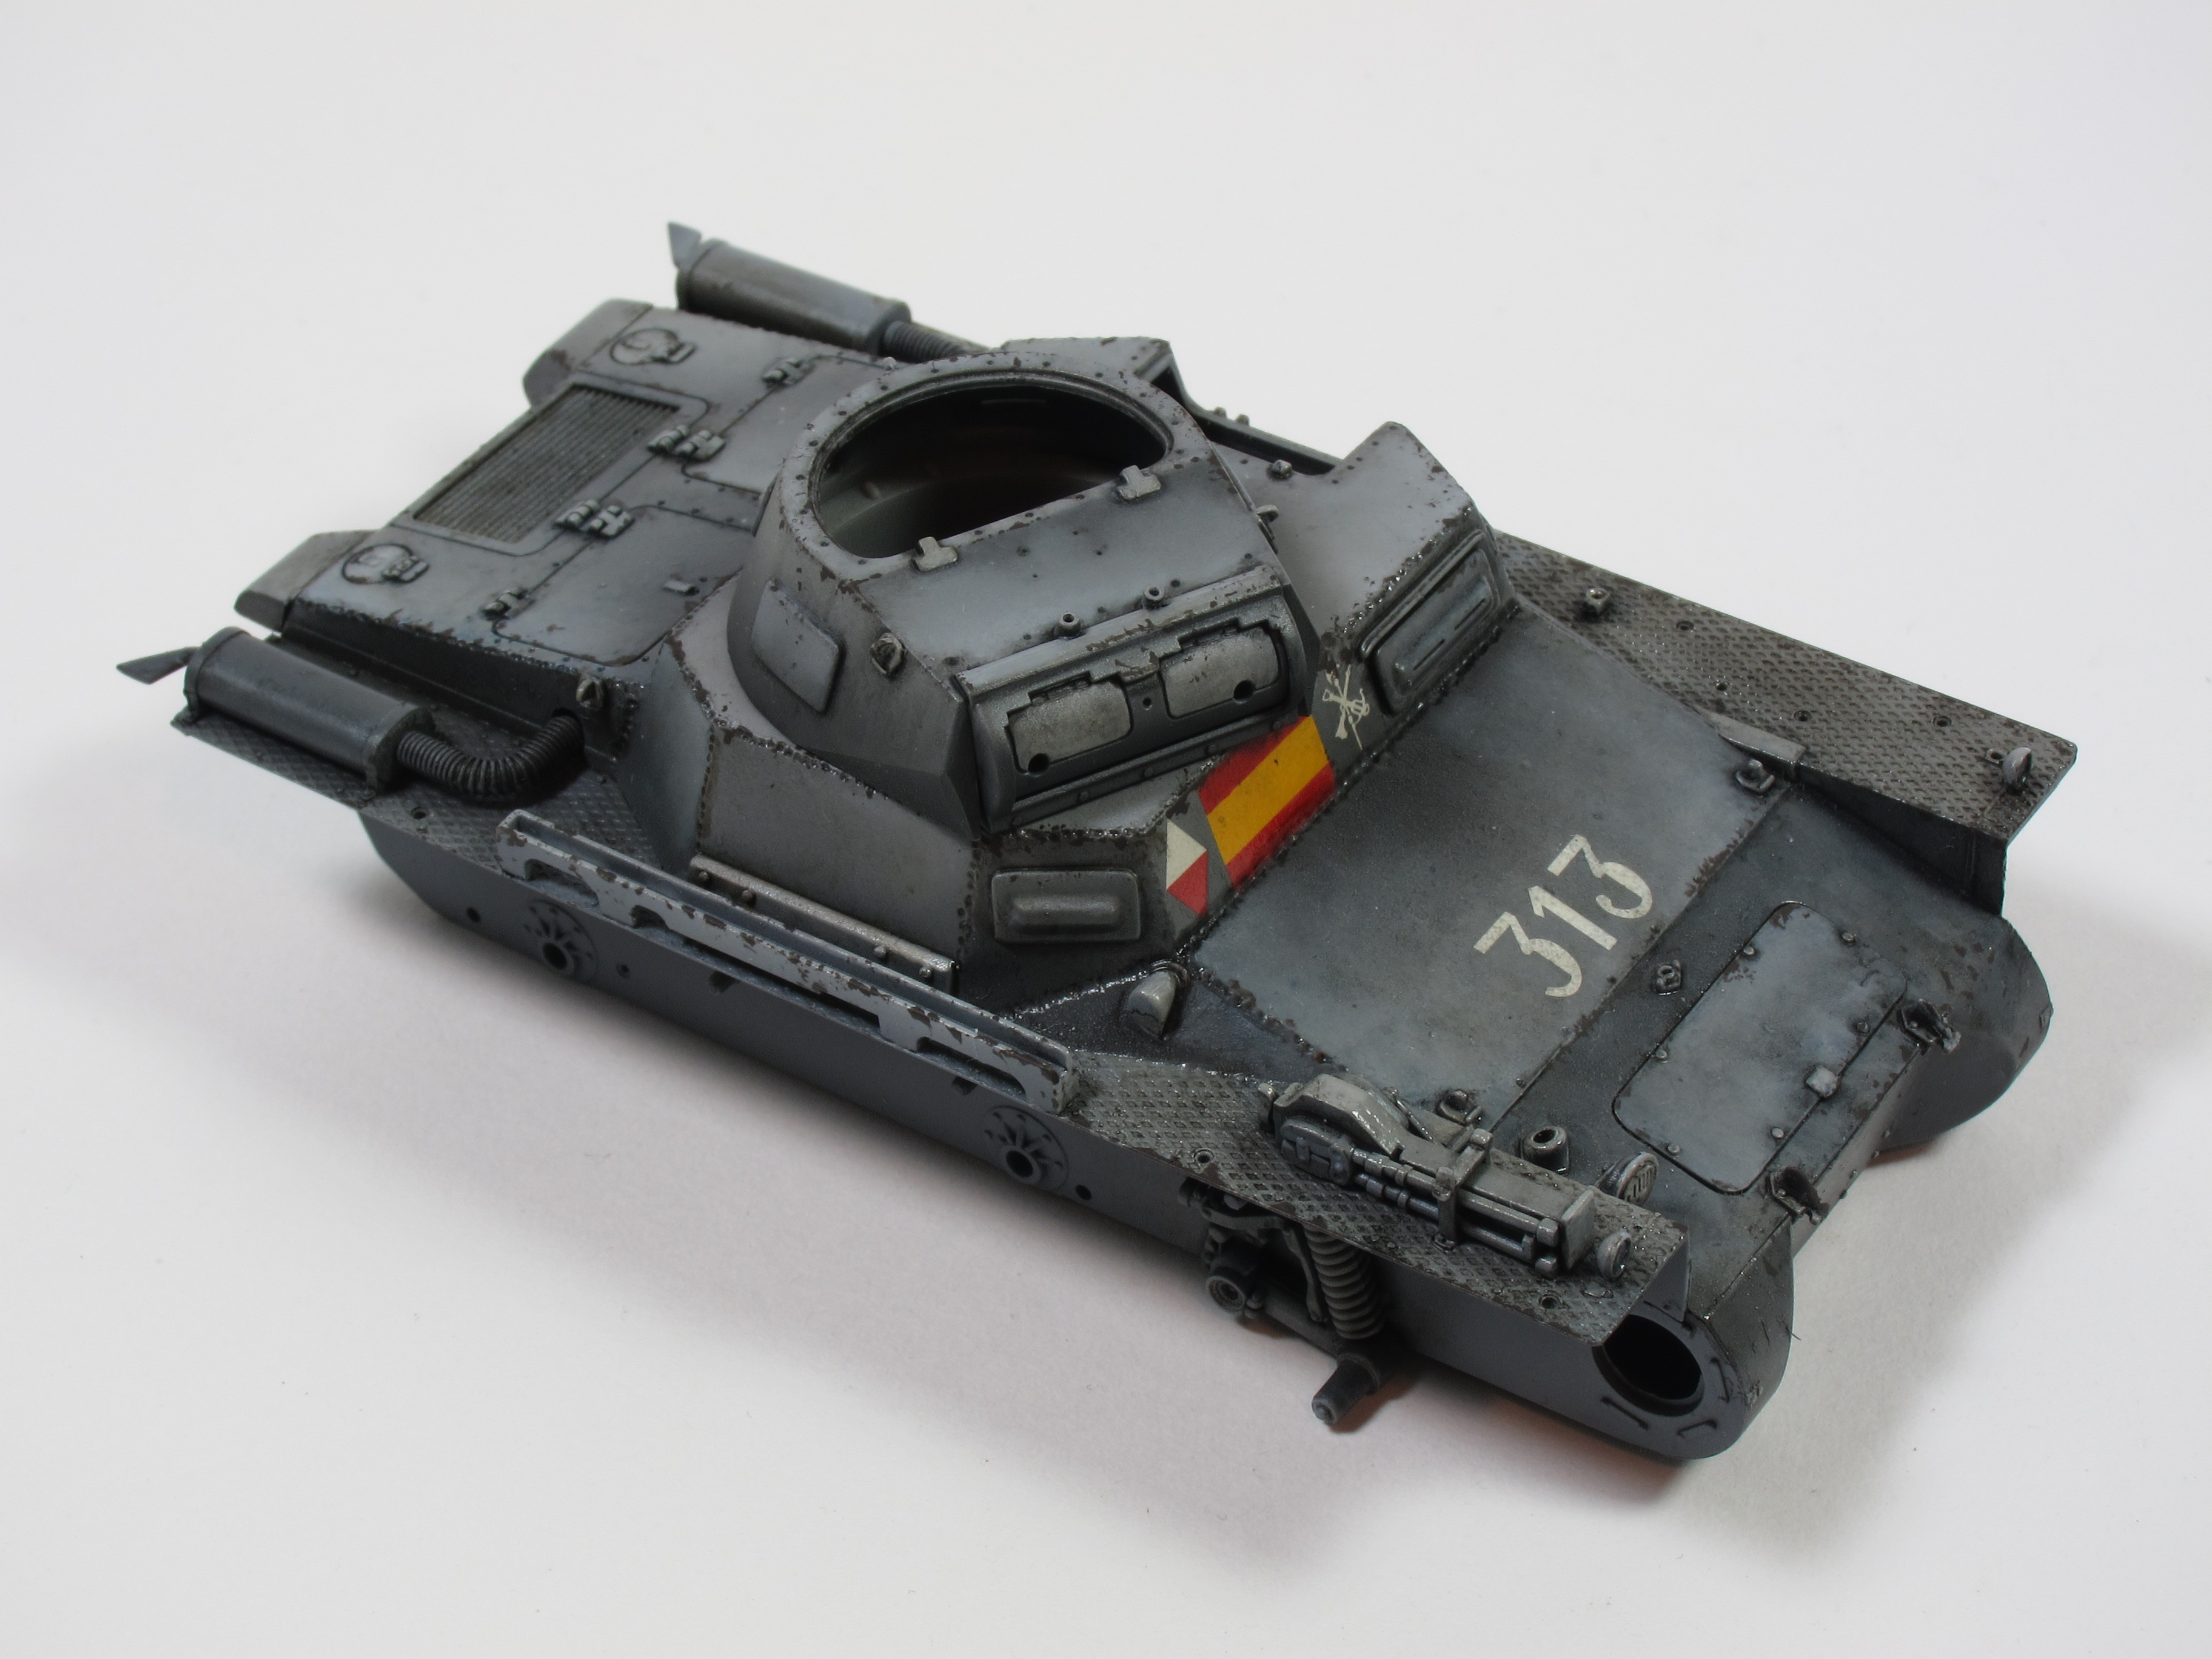
Filters, pin washes and oil gradients applied.

After the paint work was done, the model was set aside for the oils to dry. Work was begun on the next element of the diorama:

Cheers and thanks for watching!
Pete
